The short answer
The right Starlink roof mount depends on your roof. Starlink makes a Pivot Mount for sloped roofs, a no-drill Ridgeline Mount (not for clay tiles), a Wall Mount and a Pipe Adapter for metal poles. On Nigerian buildings our installers also use steel poles and brackets on parapets, gable walls and water-tank stands. ZuraLink Limited’s current price for a wall or pivot mount is ₦120,000, plus ₦120,000 for installation.
Official Starlink mounts and what each one is for
Starlink lists these mounts for its Standard (Gen 3) dish, sold in 2026 as the Standard 4 and Standard 4 X kits. Apart from our own notes on the kickstand and Mount Adapter rows, the limits in the right-hand column come from Starlink’s accessory guides.
| Mount | What it is for | Starlink’s limits and notes |
|---|---|---|
| Kickstand (in the box) | Standing the dish on flat ground or a flat roof | Not a fixed mount; secure and tether it |
| Pivot Mount | Sloped roofs, with a swivel for direction and angle | Designed for shingled roofs; comes with sealant tape |
| Wall Mount | Outside walls near the gable or fascia top | Roof overhang of 4 inches (about 10 cm) at most; 460 mm long; silicone, 2 lag screws and 20 cable clips included |
| Pipe Adapter Mount | Fitting the dish to a pole | Metal pipes of 31-63.5 mm (1.25-2.5 in) only, not PVC or plastic; pipe not included |
| Ridgeline Mount | Sitting over a roof ridge with no drilling | Four ballast weights (25.3 kg in total); roof slope under 45°; wind up to 80 km/h; not recommended for clay tile roofs |
| X-Frame Base | A freestanding base | Listed among Starlink’s Standard mounts |
| Mount Adapter | Fitting the current dish to older Gen 2 wall, pivot, ground-pole or ridgeline mounts | Useful when upgrading from a Gen 2 kit |
Two safety points from Starlink’s installation guides apply to every mount: its mounts “are not designed for high winds, hurricane or tornado wind loads”, and a tether “should be used in all cases”. Starlink also sells a Mobility Mount and Roof Rack Mount for vehicles; those are covered in our guide to Starlink in a car, car mounts and 12 V.
Which mount for which Nigerian roof?
Some of Starlink’s mounts, such as the Pivot Mount, are designed for shingled roofs, which are rare in Nigeria. These are the options that suit the roofs and structures our installers meet, with examples from our own jobs. If you are doing the work yourself, take roof safety seriously: use a secured ladder, never work alone, stay off the roof in rain, wind or lightning, and don’t step on unsupported sheets or tiles.
Stone-coated steel roofs
A bracket or short pole at the ridge puts the dish at the highest point without loading the tiles. Walk only where the tiles are supported, and seal every fixing. On one stone-coated roof, solar panels already covered much of the roof, so we fixed the dish on the ridge above the panels and measured 86 Mbps download in the Starlink app at handover.
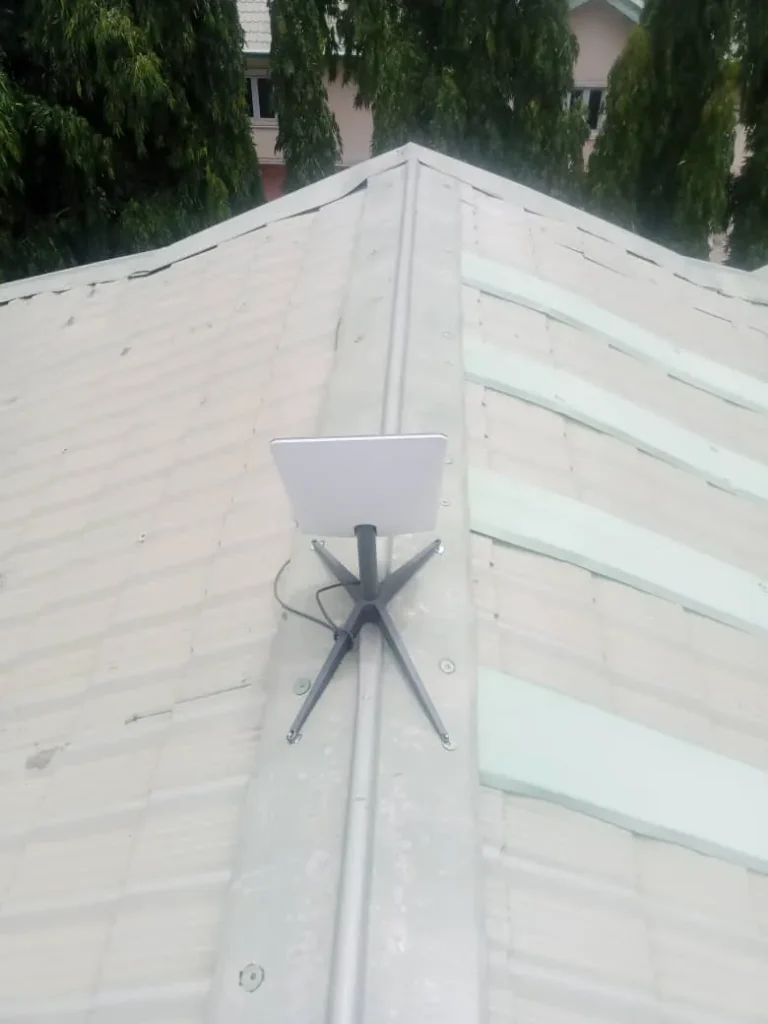
Aluminium and corrugated long-span roofs
Thin sheets cannot hold a mount on their own. Fix a pivot mount or bracket through the raised crown of the sheet into the purlin or rafter underneath, and seal each screw. A short pole fixed at the roof edge is often neater.
Clay and concrete tiles
Starlink does not recommend the Ridgeline Mount on clay tiles, and tiles crack when someone stands on the wrong spot. A wall or gable bracket, or a pole fixed to the wall, keeps the dish off the tiles altogether.
Gable walls on two-storey houses
The gable gives height without touching the roof covering. Starlink’s Wall Mount allows a roof overhang of no more than 4 inches; Nigerian houses often have deeper eaves, so a longer bracket may be needed to clear them. See how we mounted a dish on a gable-edge bracket on a two-storey home.
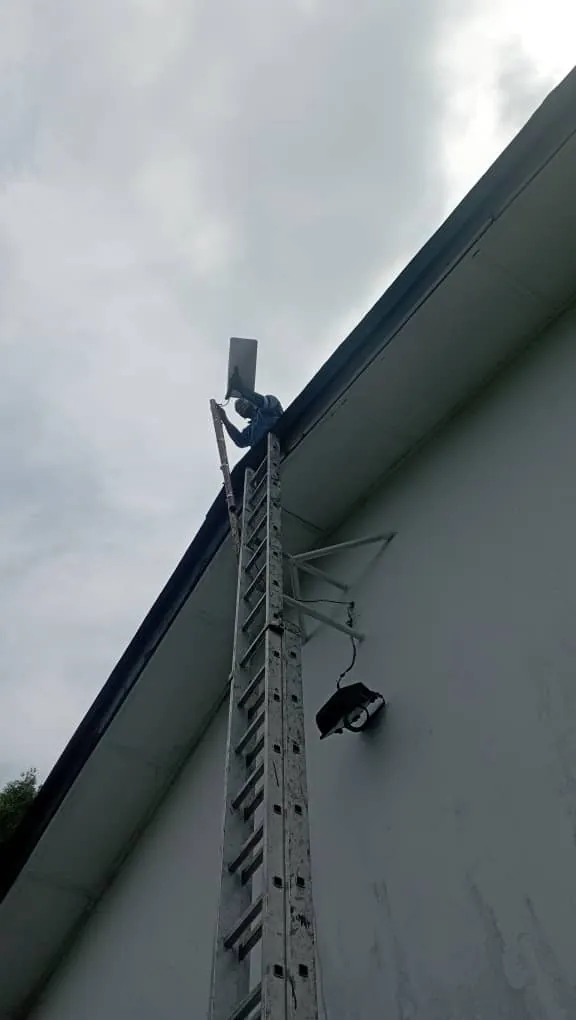
Concrete parapets and flat roofs
A steel pole set in concrete or bolted to the parapet gives a fixed, permanent mount. On a flat roof the dish can also sit on its kickstand or a base, weighted down and tethered, without breaking the waterproofing.
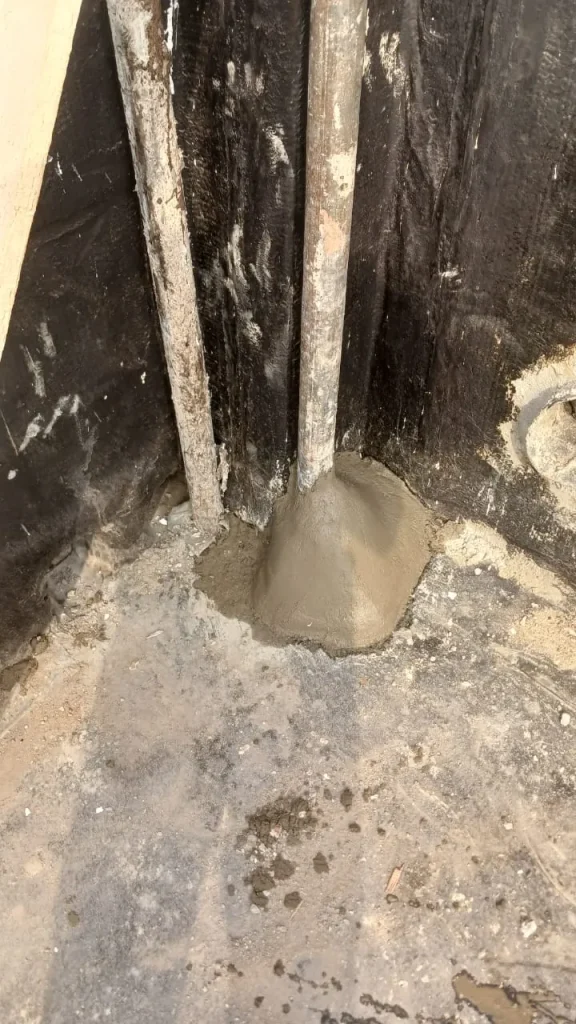
Water-tank stands and towers
In many compounds the steel tank stand is the highest point. An extension pole on top of it can lift the dish over trees and neighbouring roofs. Check the stand is solid and free of serious rust first. Here is how we raised a dish above the water tanks for a clear sky.
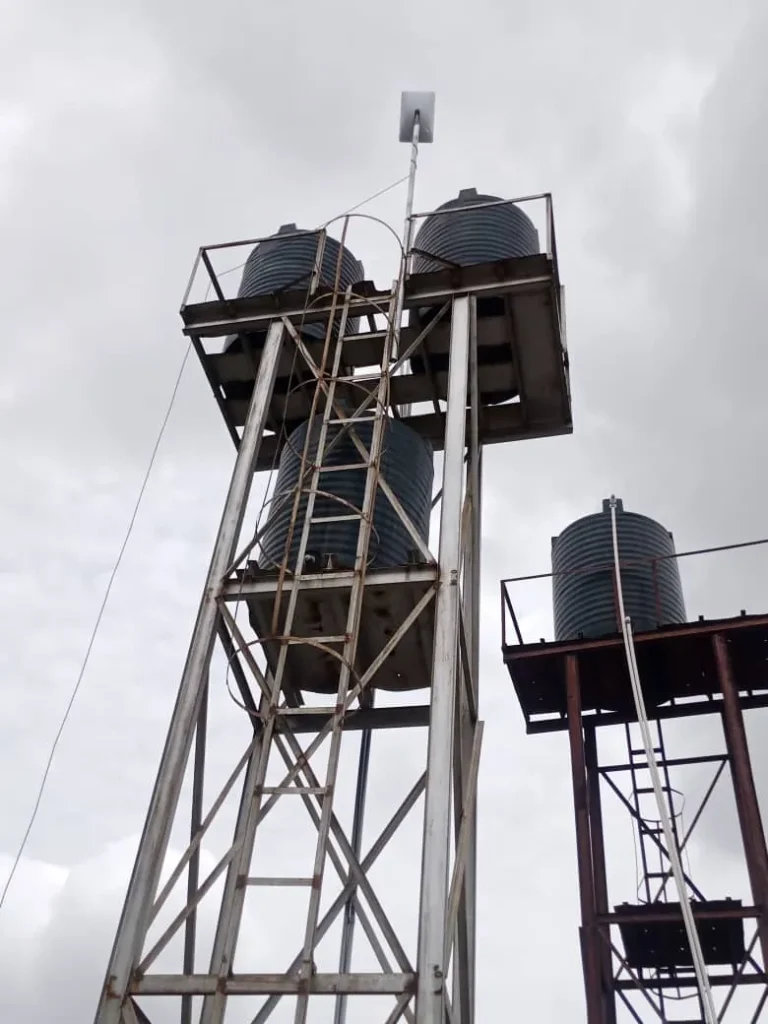
Industrial and steel-framed buildings
On a site building, a steel pole welded to the roof edge or frame makes a mount that is unlikely to loosen over time. Paint the welds against rust. On one industrial site we welded a steel pole to the roof edge and raised the dish well above the roof line.
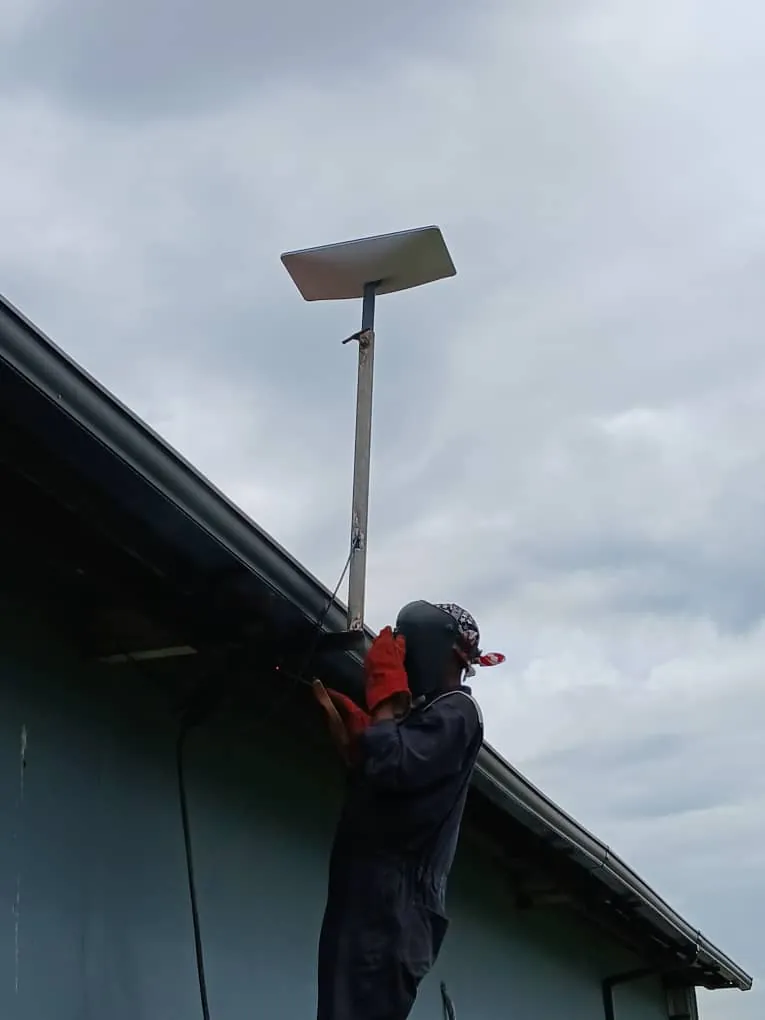
More examples, from barges to bungalows, are on our installations page.
Starlink poles: size, height and wind
- Diameter. Starlink’s Pipe Adapter fits metal pipes of 31-63.5 mm. Most “2-inch” steel pipes fall inside that range, whether 2 inches is the outside diameter (about 51 mm) or the plumbing size (about 60 mm outside), but measure the outside before you buy.
- Material. Metal only. Starlink says the Pipe Adapter is not for PVC or plastic pipes, which bend and crack in the sun.
- Height. We have found no minimum height in Starlink’s guides; they simply advise a roof, pole or wall where ground level has no clear view. Higher clears more trees, but every extra metre adds leverage on the fixings, so tall poles need bracing.
- Ground poles. Starlink’s older ground-pole guide set the pole in concrete in a hole 0.6 m deep and about 0.5 m wide, within 5 degrees of vertical. That is still a good standard.
- Wind. Starlink rates the dish as operational in winds of 96 km/h and above, but says its mounts are not designed for high winds. Tether the dish, and check the fixings after the first big storm of the rainy season.
Before anything is drilled or welded, check the spot for obstructions in the Starlink app. Independent guides also suggest running the dish in a temporary position for at least 12 hours first. Our guide to Starlink obstructions and trees explains how to read the result.
No-drill Starlink mounts
- Ridgeline Mount. Sits over the ridge on 25.3 kg of ballast. It suits slopes under 45° and winds up to 80 km/h, and is not recommended for clay tiles. A strong storm gust can go past 80 km/h, so it suits sheltered roofs best.
- Kickstand or base on a flat roof. Weighted and tethered, with no holes in the roof.
- Open ground. In a large compound with a wide view of the sky, the dish can sit on the ground on its base, away from the tree line and foot traffic.
- Clamps. A pole clamped to a railing, a tank stand or an existing mast needs no drilling into the building.
Third-party and 3D-printed mounts
J-mounts, tripods, quadpod bases, quick-release brackets, 90-degree adapters and 3D-printed holders are all sold online. They are not Starlink products. Before you buy one, check three things: that it fits your dish’s fitting exactly, that it is metal or a heat-resistant material (many 3D-printing plastics soften at temperatures a Nigerian roof reaches in the afternoon sun), and that it has somewhere to fix a tether. If in doubt, use the official mount or a steel pole and the Pipe Adapter.
Starlink Mini mounts
The Mini comes with a kickstand, a pipe adapter and a flat mount in the box. Starlink also sells a Mini Wall Mount (again 4 inches of overhang at most) and a Mini Pivot Mount. For the flat mount, Starlink recommends 6 mm (1/4 in) screws or bolts into wood at least half an inch (about 13 mm) thick. Independent testers have reported the Mini overheating in strong direct sun, which is worth keeping in mind on an exposed roof.
How much does a Starlink mount cost in Nigeria?
ZuraLink Limited’s current price for a wall or pivot mount is ₦120,000, and professional installation is ₦120,000. Poles, welding and custom brackets depend on the site, so send us photos for a quote. Prices change with the exchange rate; see our current Starlink prices for the full list.
Getting the mount right first time
A mount that is wrong for the roof leaks, loosens or blocks the sky, and fixing it later costs more than doing it once. Our installers choose the mount on site, check for obstructions in the app before drilling and seal every fixing. Read our guide on how to install Starlink in Nigeria, book our Starlink installation service, or WhatsApp us a photo of your roof. You can also call 0802 859 5303.
Starlink mount FAQs
Can I use Starlink without a mount?
Yes, for a while. The kickstand lets the dish stand on flat ground or a flat roof, but it should be weighted and tethered, and a fixed mount is better for permanent use.
What size pole do I need for a Starlink?
A metal pole between 31 mm and 63.5 mm in outside diameter fits Starlink’s Pipe Adapter. Galvanised steel is the usual choice.
Can I mount Starlink on a PVC pipe?
No. Starlink says its Pipe Adapter is only for metal pipes, not PVC or plastic.
Is the Ridgeline Mount OK on a tiled roof?
Starlink does not recommend it on clay tile roofs. It also needs a slope under 45° and is rated for wind up to 80 km/h.
Do I have to drill my roof to install Starlink?
Not always. A ridgeline mount, a weighted base on a flat roof, a gable bracket or a clamp on an existing pole can all avoid holes in the roof covering.
How much is a Starlink wall mount in Nigeria?
Our current price for a wall or pivot mount is ₦120,000, with installation at ₦120,000.